
A Beginner's Guide to Applying Printable Vinyl


Preparation is Key
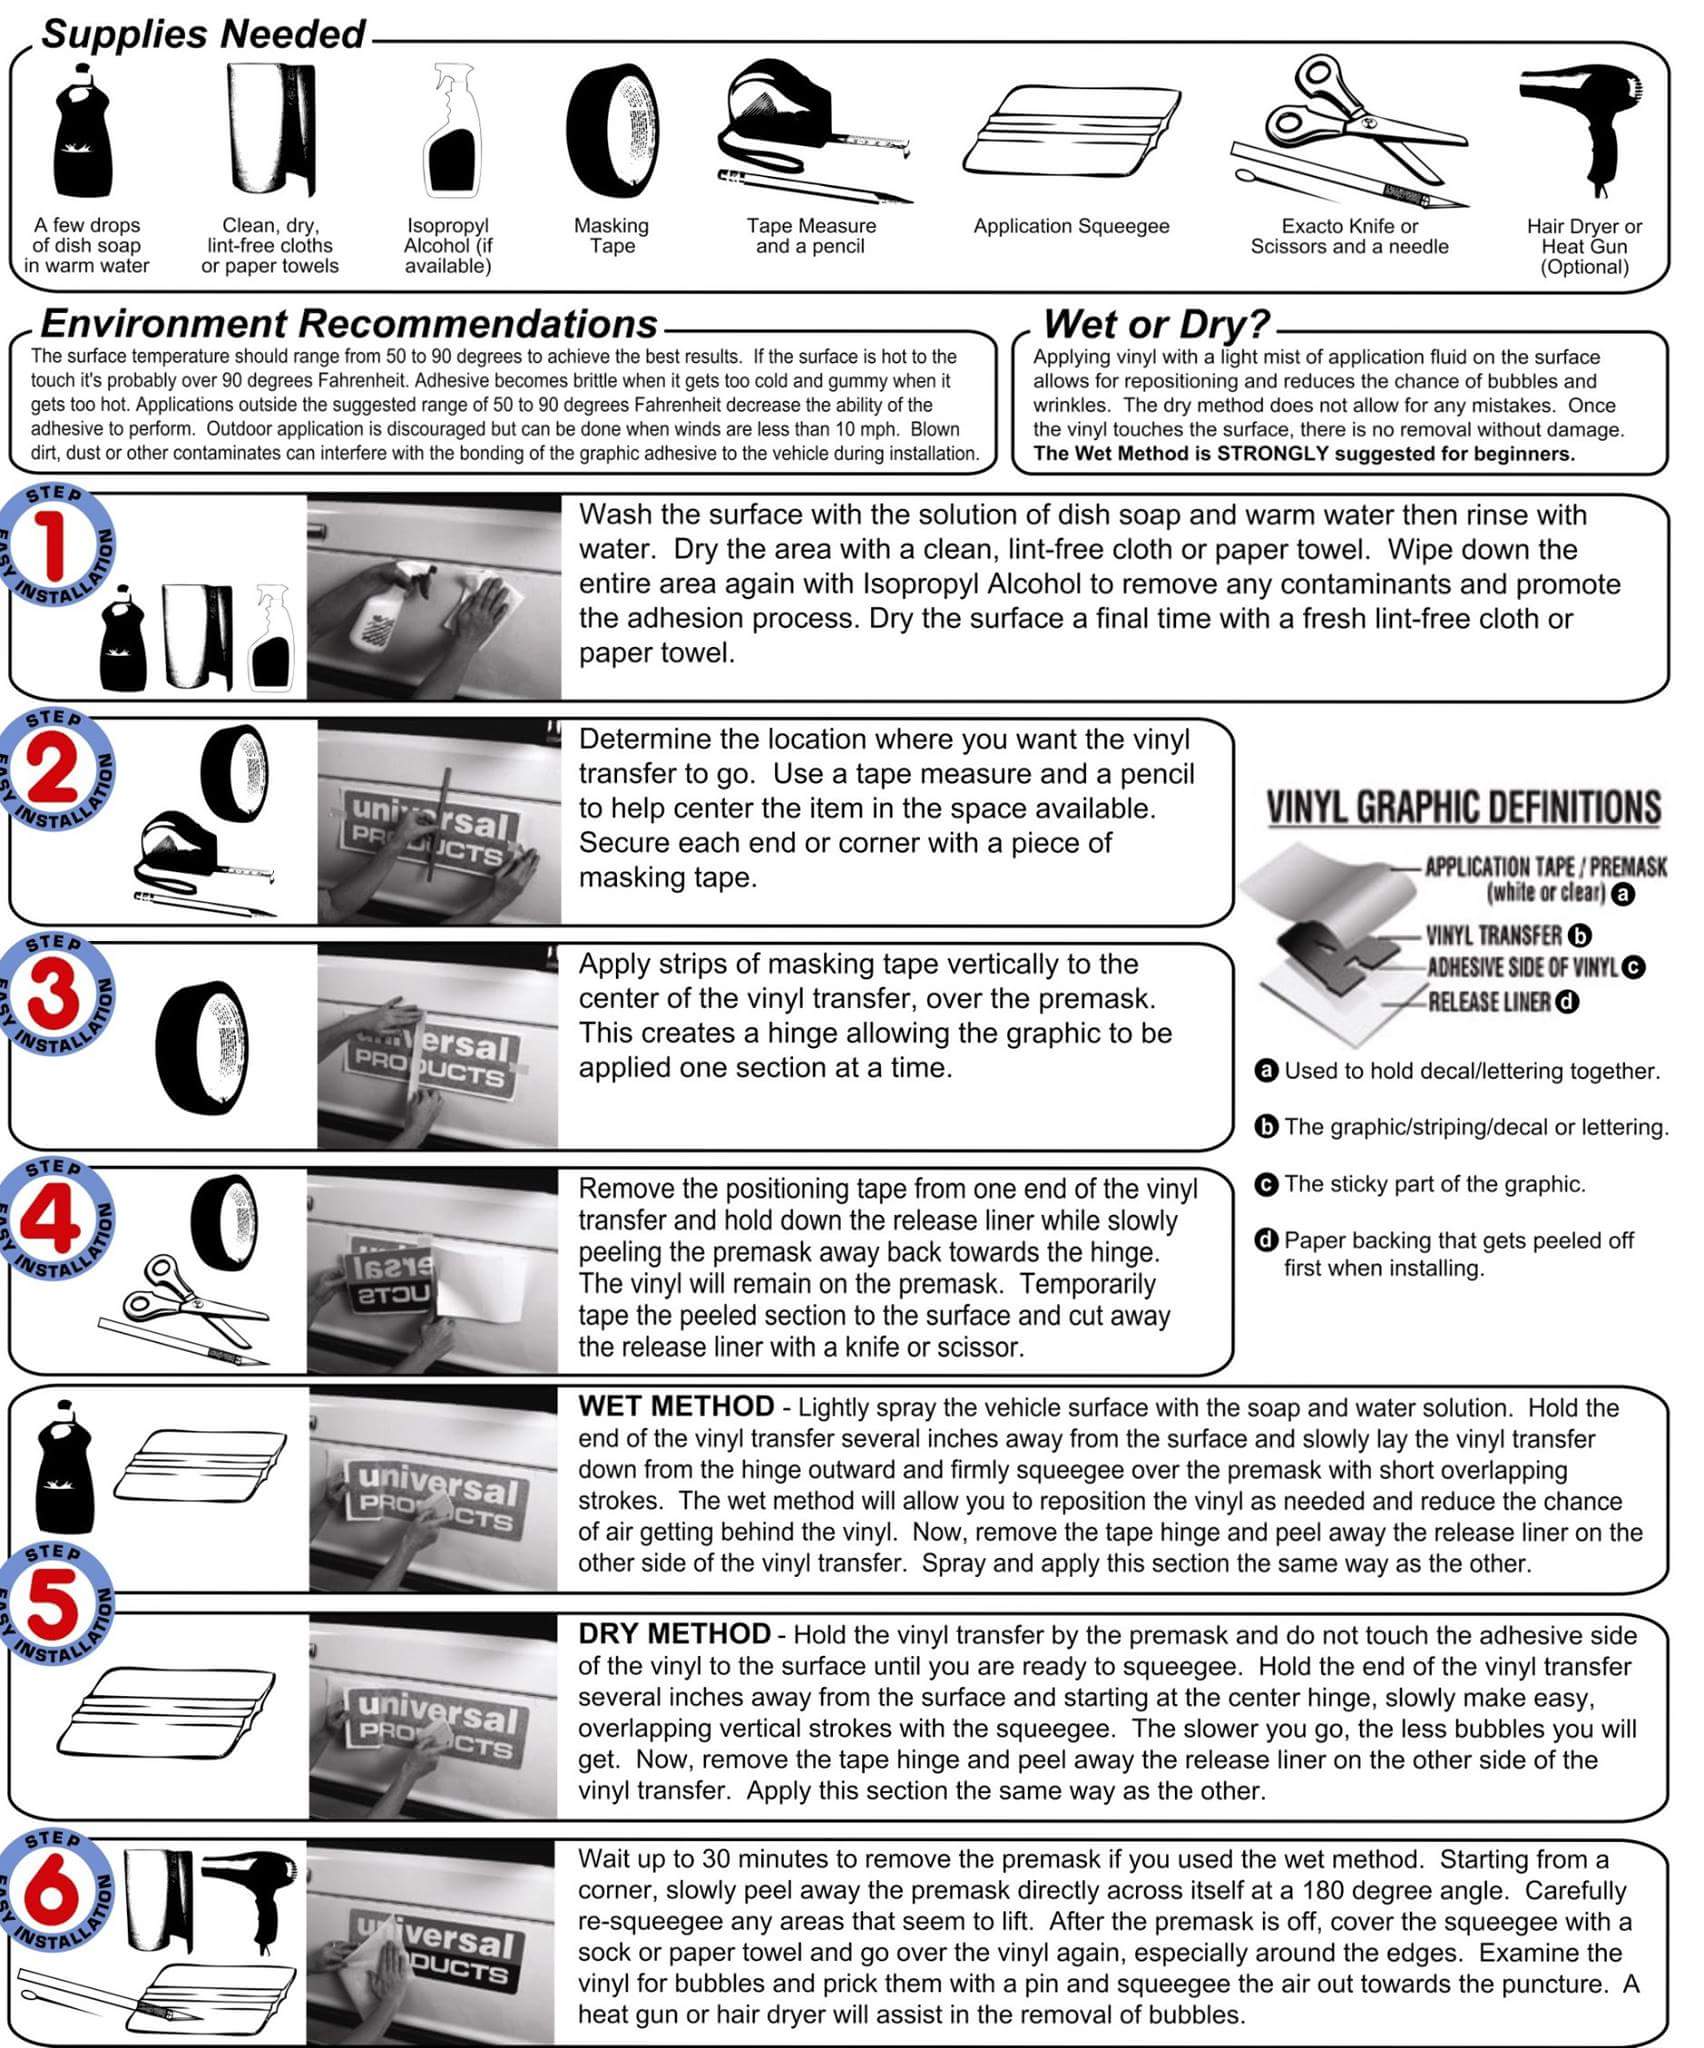
Applying printable vinyl can be a fun and creative way to add a personal touch to your projects. Whether you're making signs, decals, or custom designs, printable vinyl is a versatile material that can be used on a variety of surfaces. However, applying it can be a bit tricky, especially for beginners. In this article, we'll walk you through the steps to apply printable vinyl like a pro.
Before you start applying the vinyl, make sure you have the right tools and materials. You'll need a cutting machine, a weeding tool, and a transfer tape. You'll also need to prepare your surface by cleaning it with soap and water and letting it dry completely. This will ensure that the vinyl adheres properly and doesn't peel off easily.
Troubleshooting Common Issues
Once you've prepared your surface, it's time to apply the vinyl. Start by cutting your design using a cutting machine, and then weed out the excess vinyl using a weeding tool. Apply the transfer tape to the top of the vinyl, and then place it on your surface. Use a credit card or a similar tool to smooth out any air bubbles or wrinkles. If you encounter any issues during the application process, don't worry. We've got some troubleshooting tips to help you out.
One common issue that people encounter when applying printable vinyl is air bubbles or wrinkles. To fix this, simply use a needle or a pin to poke a small hole in the bubble, and then use a credit card to smooth it out. Another issue is the vinyl peeling off easily. To prevent this, make sure you've cleaned and prepared your surface properly, and use a high-quality transfer tape. With these tips and tricks, you'll be able to apply printable vinyl like a pro and create beautiful, professional-looking designs.