Cricut Maker Settings for Printable HTV: A Comprehensive Guide
Understanding Printable HTV and Cricut Maker Settings
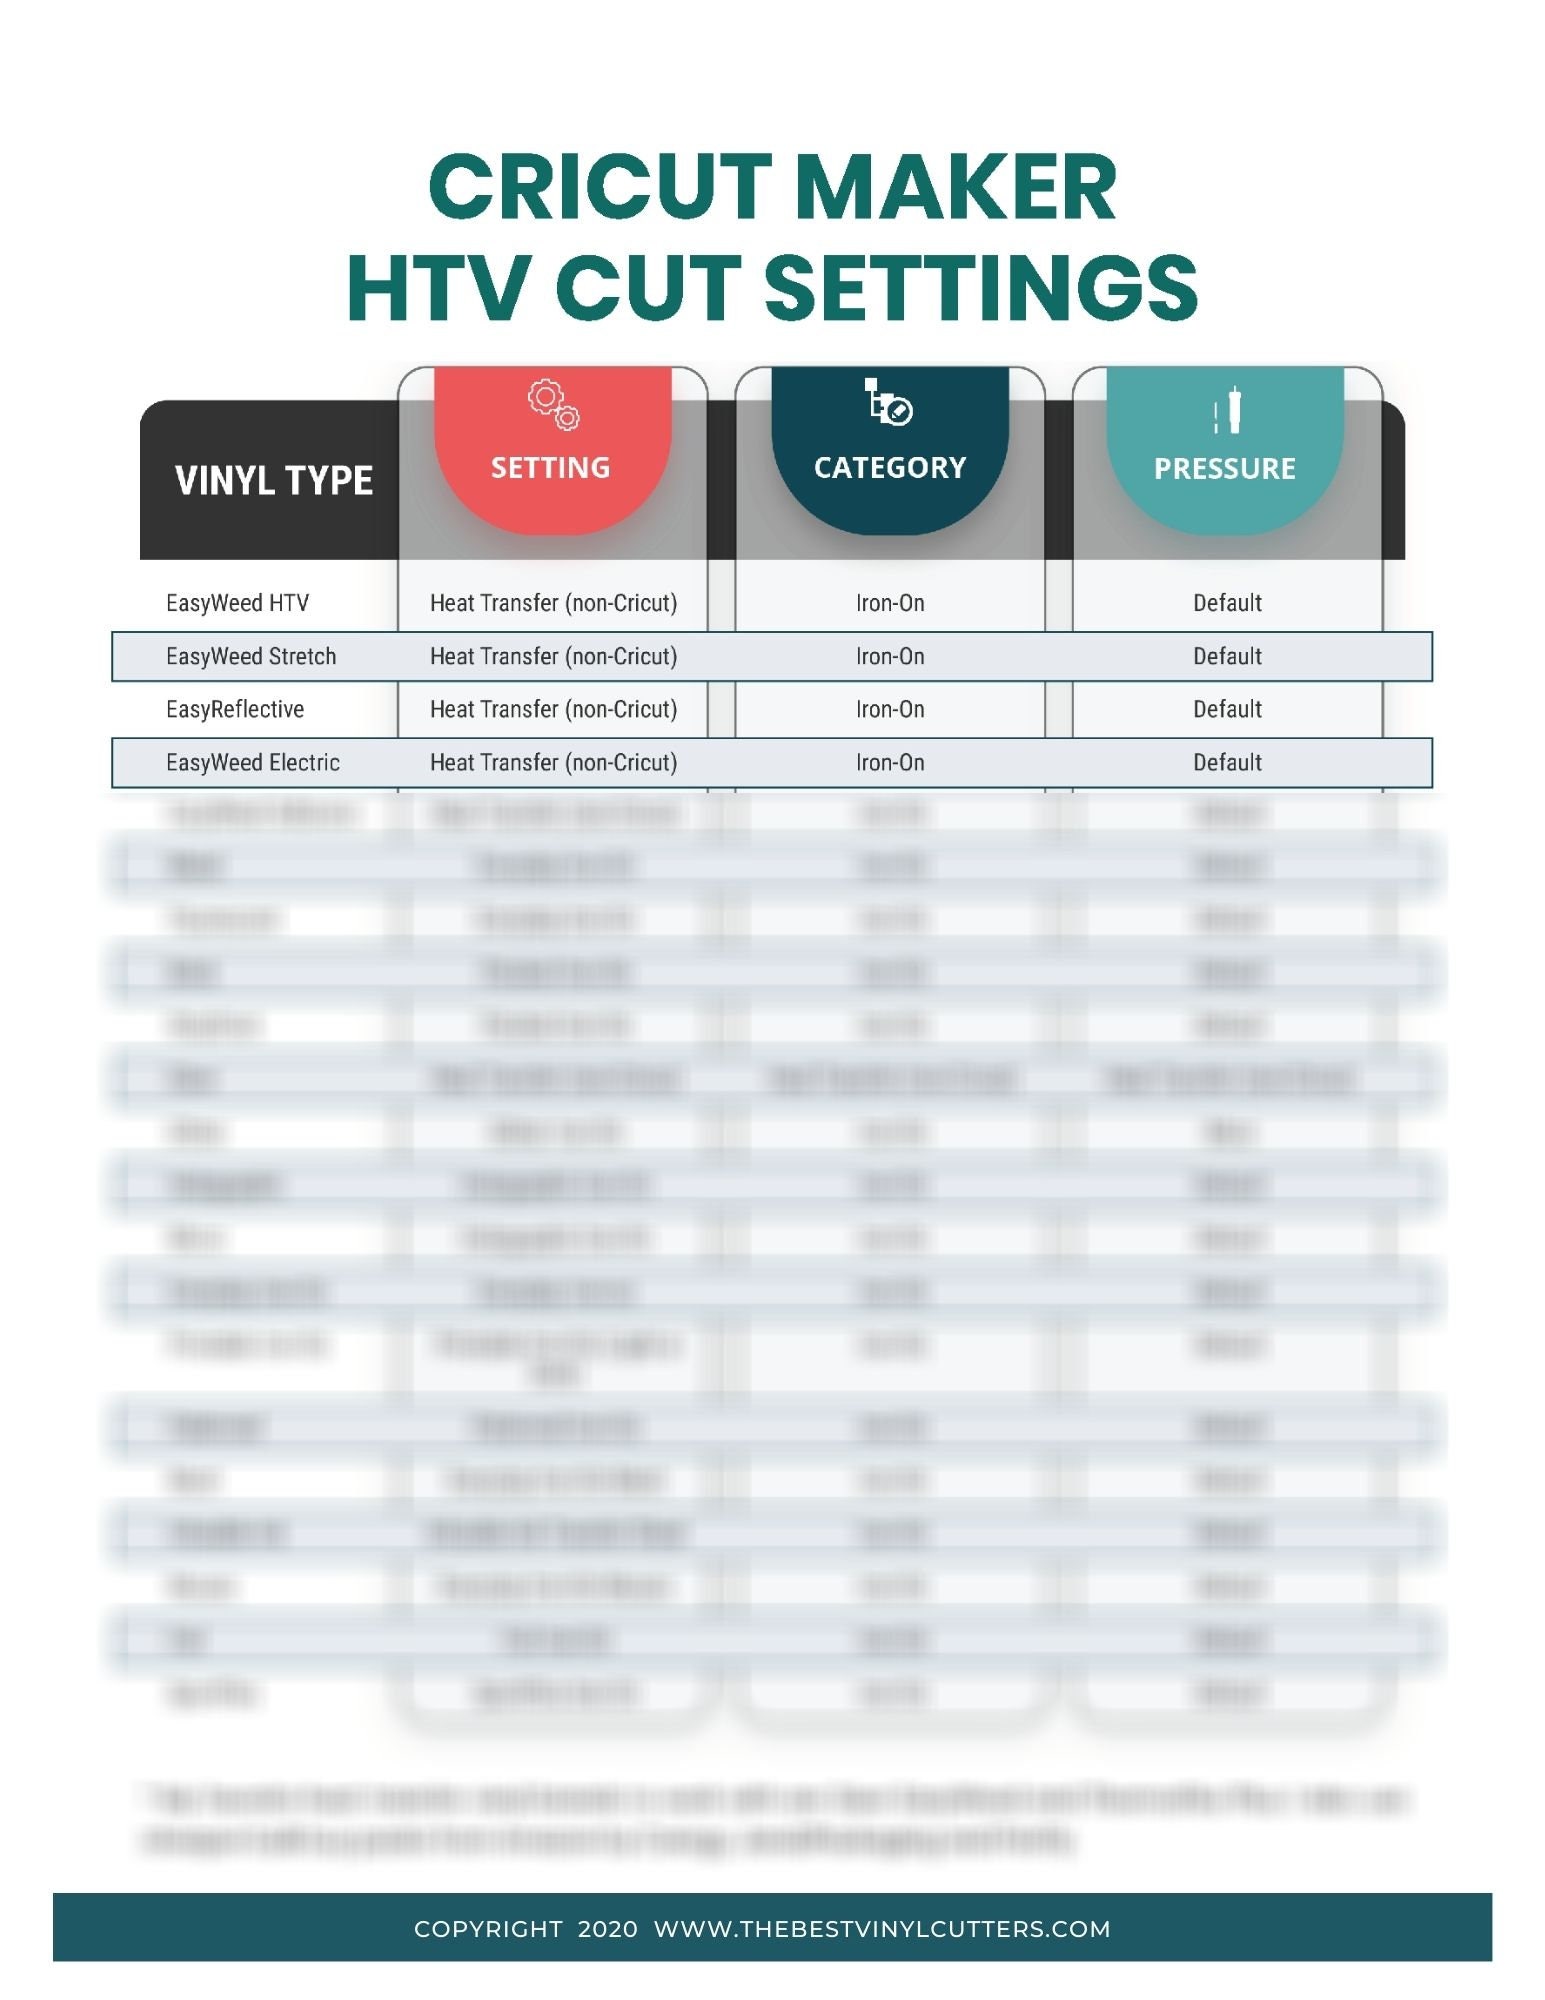
When it comes to working with printable heat transfer vinyl (HTV) and the Cricut Maker, getting the right settings can be a game-changer for your custom apparel and craft projects. Printable HTV is a versatile material that allows you to print custom designs and images onto various fabrics, and with the Cricut Maker, you can precision-cut these designs with ease. However, finding the perfect balance of settings to ensure a smooth cutting process and a durable finish can be daunting, especially for beginners.
To achieve optimal results with printable HTV on your Cricut Maker, it's essential to understand the different settings and materials involved. The Cricut Maker offers a range of tools and settings that cater to various materials, including printable HTV. By selecting the correct tool and adjusting the settings according to the type of printable HTV you're using, you can ensure a precise cut and a professional finish.
Tips and Tricks for Optimal Results with Printable HTV
The Cricut Maker's Fine Point Blade is ideal for cutting printable HTV, as it provides a clean and precise cut. When setting up your Cricut Maker for printable HTV, make sure to select the 'Vinyl' setting and adjust the pressure and multi-cut settings according to the thickness and type of printable HTV you're using. It's also crucial to mirror your design before cutting, as this will ensure that the image is correctly oriented when applied to the fabric.
To take your printable HTV projects to the next level, consider investing in a weeding tool and a heat press. A weeding tool allows you to remove excess vinyl with ease, while a heat press ensures a professional finish and a durable bond between the printable HTV and the fabric. Additionally, always follow the manufacturer's instructions for the printable HTV and the Cricut Maker, and experiment with different settings and materials to find what works best for you.