How to Change Worksheet Margins in Excel: A Step-by-Step Guide


Understanding Worksheet Margins in Excel
When working with Excel, it's essential to have a well-organized and readable spreadsheet. One often overlooked aspect of spreadsheet design is worksheet margins. Margins play a crucial role in determining how your spreadsheet will look when printed or shared with others. In this article, we'll show you how to change worksheet margins in Excel to enhance your spreadsheet's overall appearance and usability.
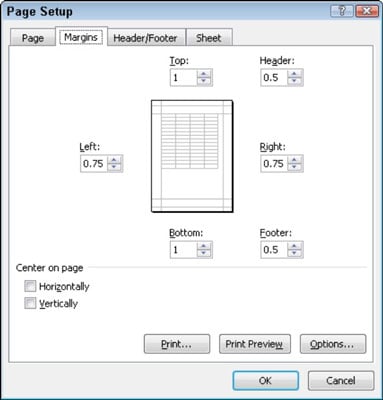
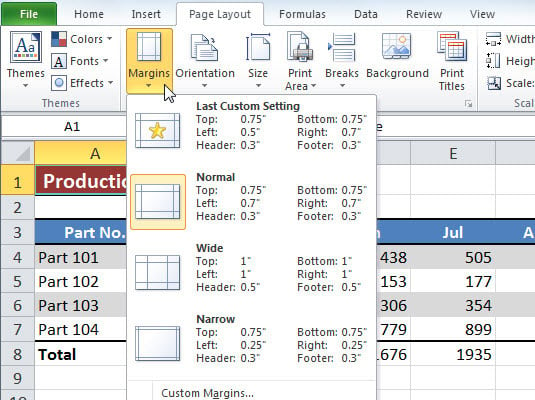
To change worksheet margins in Excel, you'll need to access the Page Setup dialog box. You can do this by clicking on the 'Page Layout' tab in the ribbon and then selecting 'Margins' from the 'Page Setup' group. From here, you can adjust the top, bottom, left, and right margins to your desired settings. You can also choose from a range of preset margin settings, including 'Normal', 'Wide', and 'Narrow'.
Adjusting Worksheet Margins for Printing
Worksheet margins in Excel refer to the blank space between the edges of the paper and the spreadsheet data. Adjusting these margins can help you fit more data on a single page, reduce wasted space, and improve the overall appearance of your spreadsheet. When adjusting margins, it's essential to consider the type of printer you're using and the paper size you've selected. This will ensure that your margins are set correctly and your spreadsheet prints as expected.
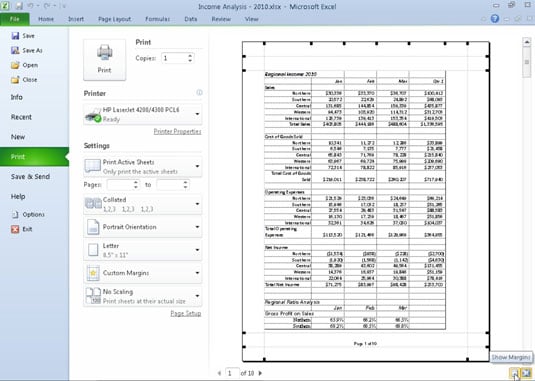
When preparing your spreadsheet for printing, it's crucial to adjust the worksheet margins to ensure that your data fits within the printable area. To do this, click on the 'Page Layout' tab and select 'Print Area' from the 'Page Setup' group. From here, you can adjust the print area to include only the data you want to print, and then adjust the margins to fit your needs. By following these simple steps, you can change worksheet margins in Excel and create professional-looking spreadsheets that are perfect for sharing or printing.