How To Print A Screen On Mac: A Step-by-Step Guide


Method 1: Using Keyboard Shortcuts
Printing a screen on Mac is a straightforward process that can be accomplished in a few simple steps. Whether you need to capture a screenshot for work, school, or personal use, Mac provides several methods to do so. In this article, we will explore the different ways to print a screen on Mac, including using keyboard shortcuts and the screenshot tool.
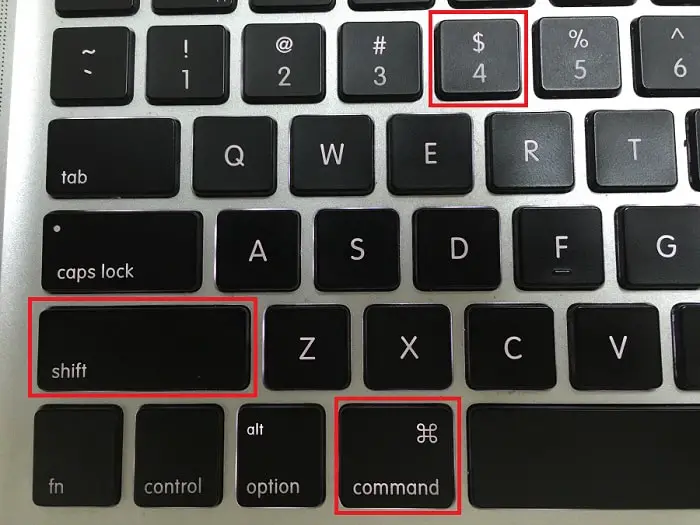
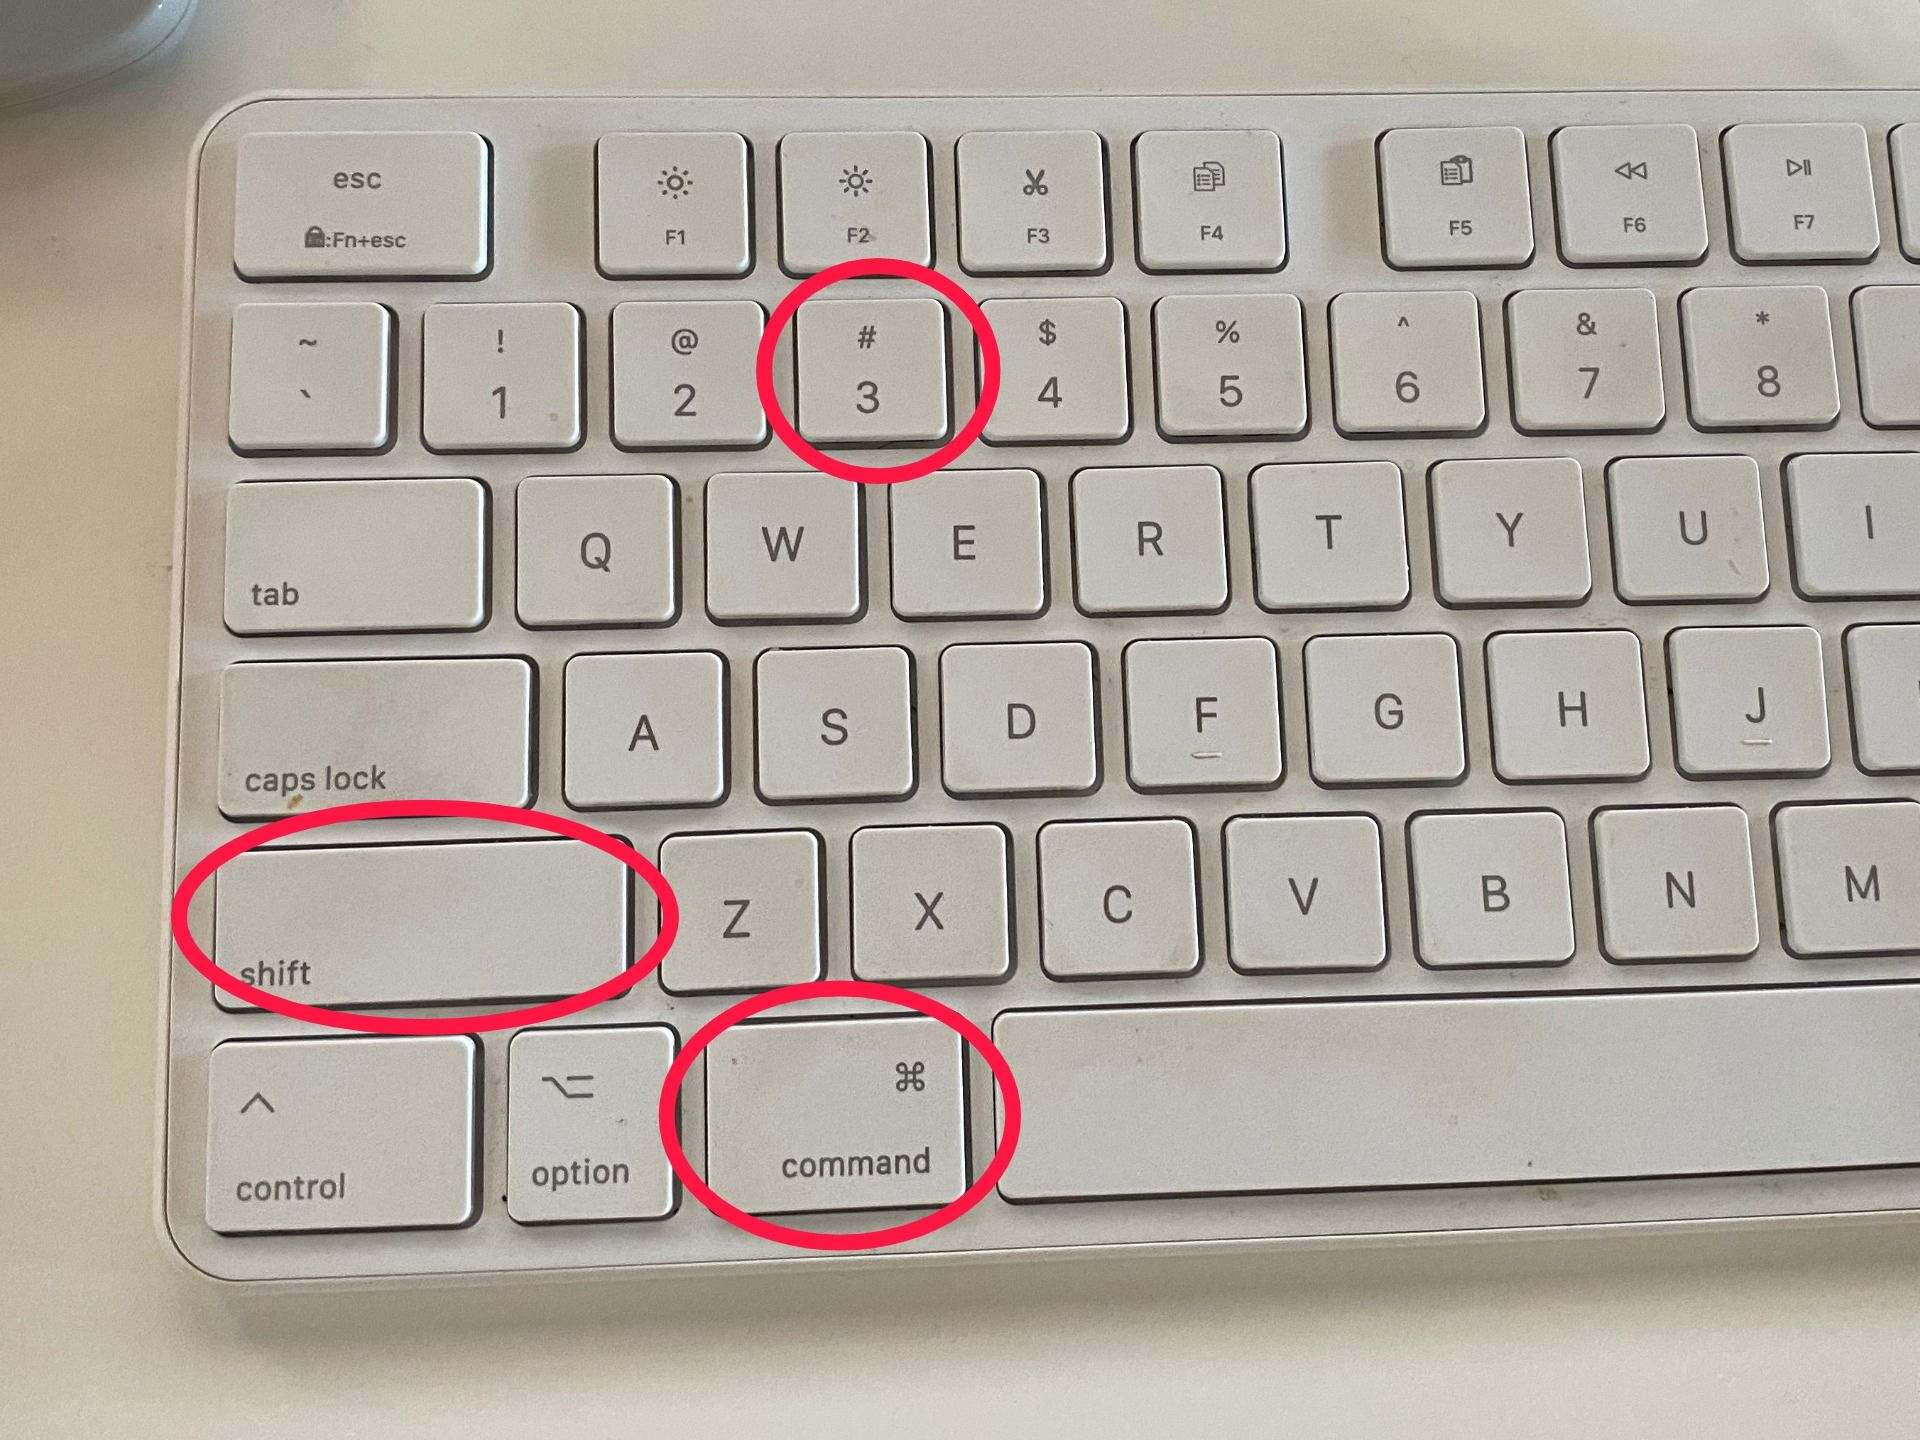
To print a screen on Mac, you can use the keyboard shortcuts Command (⌘) + Shift + 3 to capture the entire screen, or Command (⌘) + Shift + 4 to capture a selected portion of the screen. This will save the screenshot to your desktop as a PNG file. You can then print the screenshot by opening it in Preview or another image editing app and selecting the print option.
Method 2: Using the Screenshot Tool
Alternatively, you can use the screenshot tool to print a screen on Mac. To access the screenshot tool, press Command (⌘) + Shift + 5. This will open a toolbar at the bottom of the screen with several options, including Capture Entire Screen, Capture Selected Window, and Capture Selected Portion. You can select the option that best suits your needs and then print the screenshot using the print option in the toolbar. Method 2: Using the Screenshot Tool