
Printable Instructions For Easy Origami Boat
.gif)

Getting Started with Origami
Are you looking for a fun and creative activity to do with your family or friends? Look no further than making an origami boat! With just a few simple folds, you can create a beautiful and functional boat that will delight both kids and adults. In this article, we'll provide you with printable instructions for an easy origami boat that you can make at home.
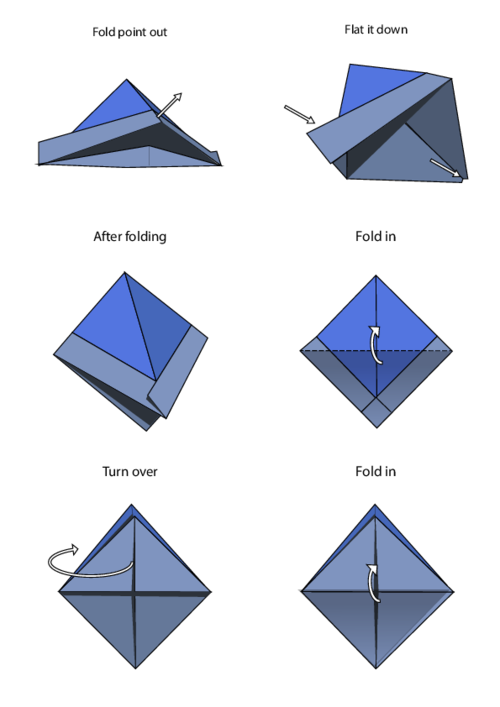
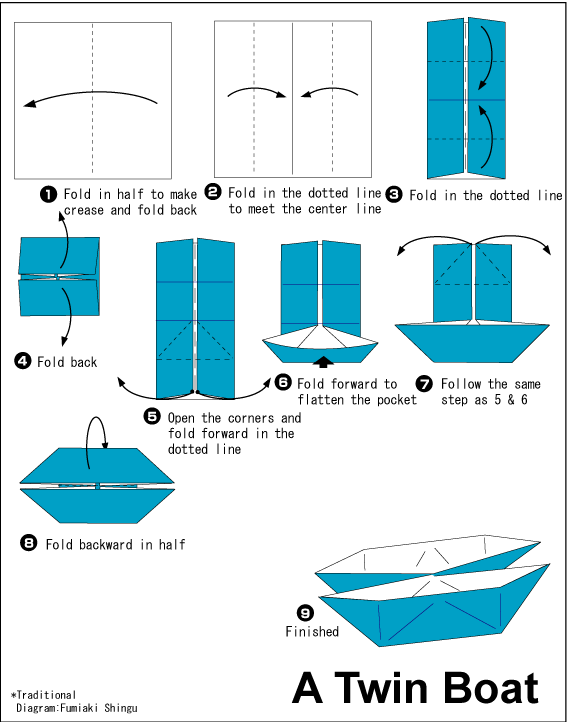
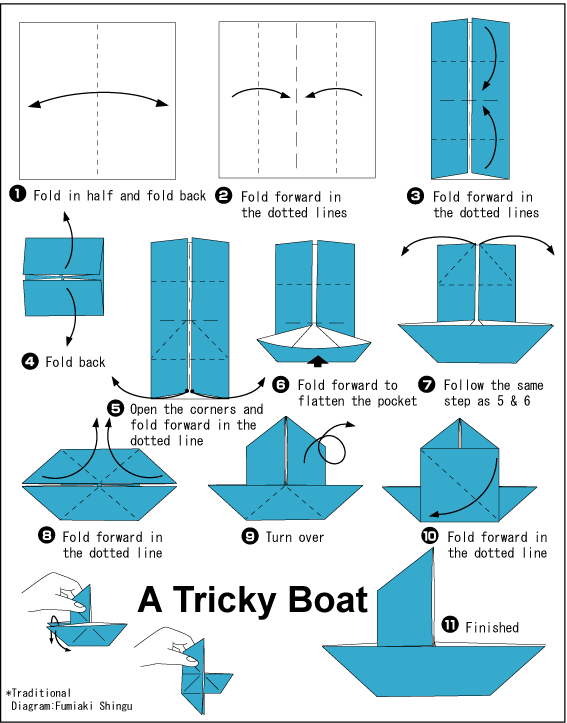
To get started, you'll need a square piece of paper. You can use any type of paper you like, but it's best to use a paper that is at least 6 inches by 6 inches. You'll also need a pencil or a ruler to help you make the folds. Once you have your paper and tools, you can begin following the instructions. The first step is to fold the paper in half diagonally to create a triangle. Then, you'll need to fold the triangle in half again, creating another diagonal line.
Tips and Variations for Your Origami Boat
Now that you've made the initial folds, you can start to create the shape of the boat. You'll need to fold the paper in half again, and then make a series of small folds along the edges. These folds will help to create the hull of the boat. As you make each fold, be sure to crease the paper sharply to create a crisp edge. This will help the boat to hold its shape and make it more stable.
Once you've completed the basic design, you can add some finishing touches to make your boat truly unique. You can add a small sail or a flag to the top of the boat, or you can decorate the hull with markers or paint. You can also experiment with different types of paper or colors to create a one-of-a-kind design. With these printable instructions, you'll be able to make a beautiful and functional origami boat that you can be proud of. So why not give it a try today and see what you can create?