
A Step-by-Step Guide to Printable Iron On Transfers


Getting Started with Printable Iron On Transfers
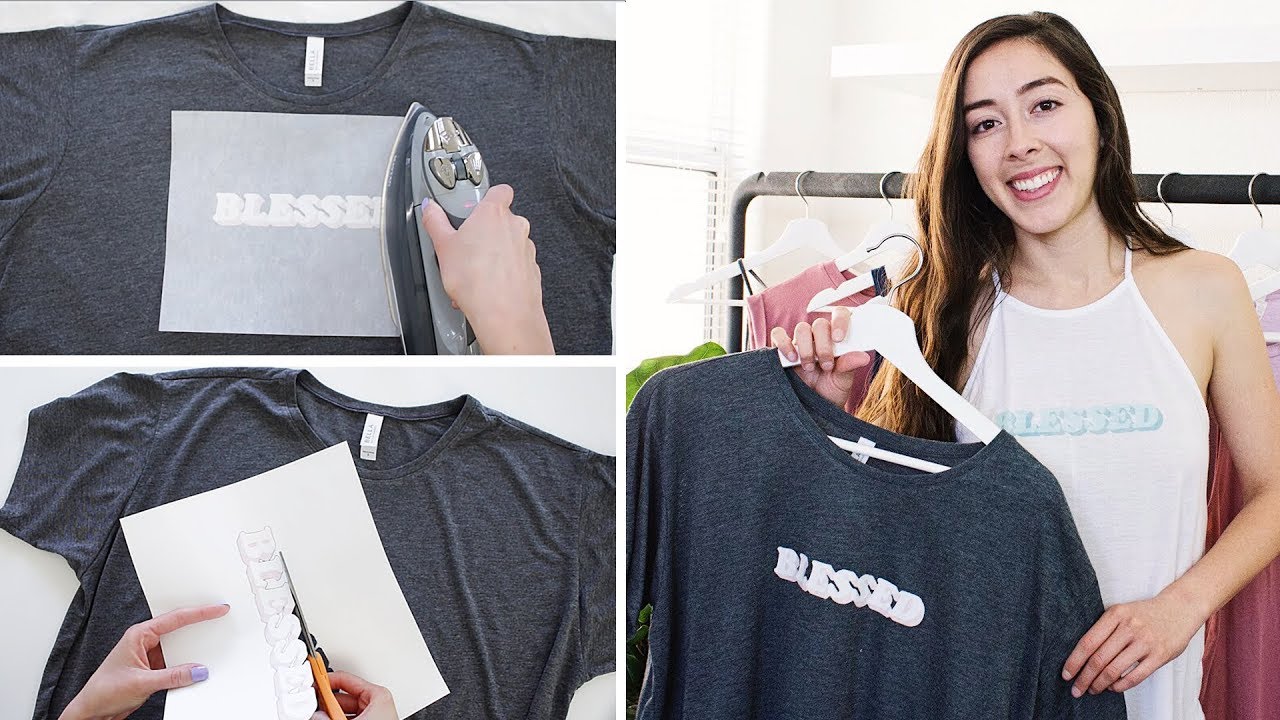
Printable iron on transfers are a great way to add custom designs to your favorite t-shirts, hoodies, and other fabrics. With a few simple steps, you can create your own unique designs and apply them to your clothing. To get started, you will need a few basic supplies, including a printer, iron on transfer paper, and a computer with design software.
The first step in creating your own printable iron on transfers is to design your image. You can use a software program like Adobe Photoshop or Illustrator to create your design. Make sure to mirror your image before printing, as the transfer will be applied in reverse. Once you have designed your image, print it onto the iron on transfer paper using your printer.
Tips and Tricks for Applying Iron On Transfers
Once you have printed your design, it's time to apply it to your fabric. Place the transfer on the fabric, with the image facing down, and cover it with a piece of cloth or parchment paper. Iron the transfer using a hot iron, applying pressure for about 10-15 seconds. Make sure to follow the instructions on the transfer paper for the recommended temperature and pressure.
To ensure that your iron on transfer lasts, make sure to wash the fabric inside out and avoid using fabric softener or bleach. You can also use a fixative spray to set the image and prevent it from fading. With a little practice, you can create professional-looking iron on transfers that will make your clothing stand out. Whether you're making custom t-shirts for a special event or just want to add some personality to your everyday clothes, printable iron on transfers are a fun and easy way to get creative.