Mastering Printable Margins in Word: A Comprehensive Guide

Understanding Printable Margins
When it comes to creating professional-looking documents, one often overlooked aspect is the printable margins in Word. Margins play a crucial role in determining the overall appearance and readability of your document. In this article, we will delve into the world of printable margins in Word, exploring what they are, why they are important, and how to adjust them to suit your needs.
Printable margins refer to the blank space between the edge of the paper and the text or images on the page. Properly set margins can make a significant difference in the aesthetic appeal of your document. They can also help prevent important information from being cut off during printing. By default, Word sets the margins to a standard size, but you can easily customize them to fit your specific requirements.
Customizing Margins for Printing
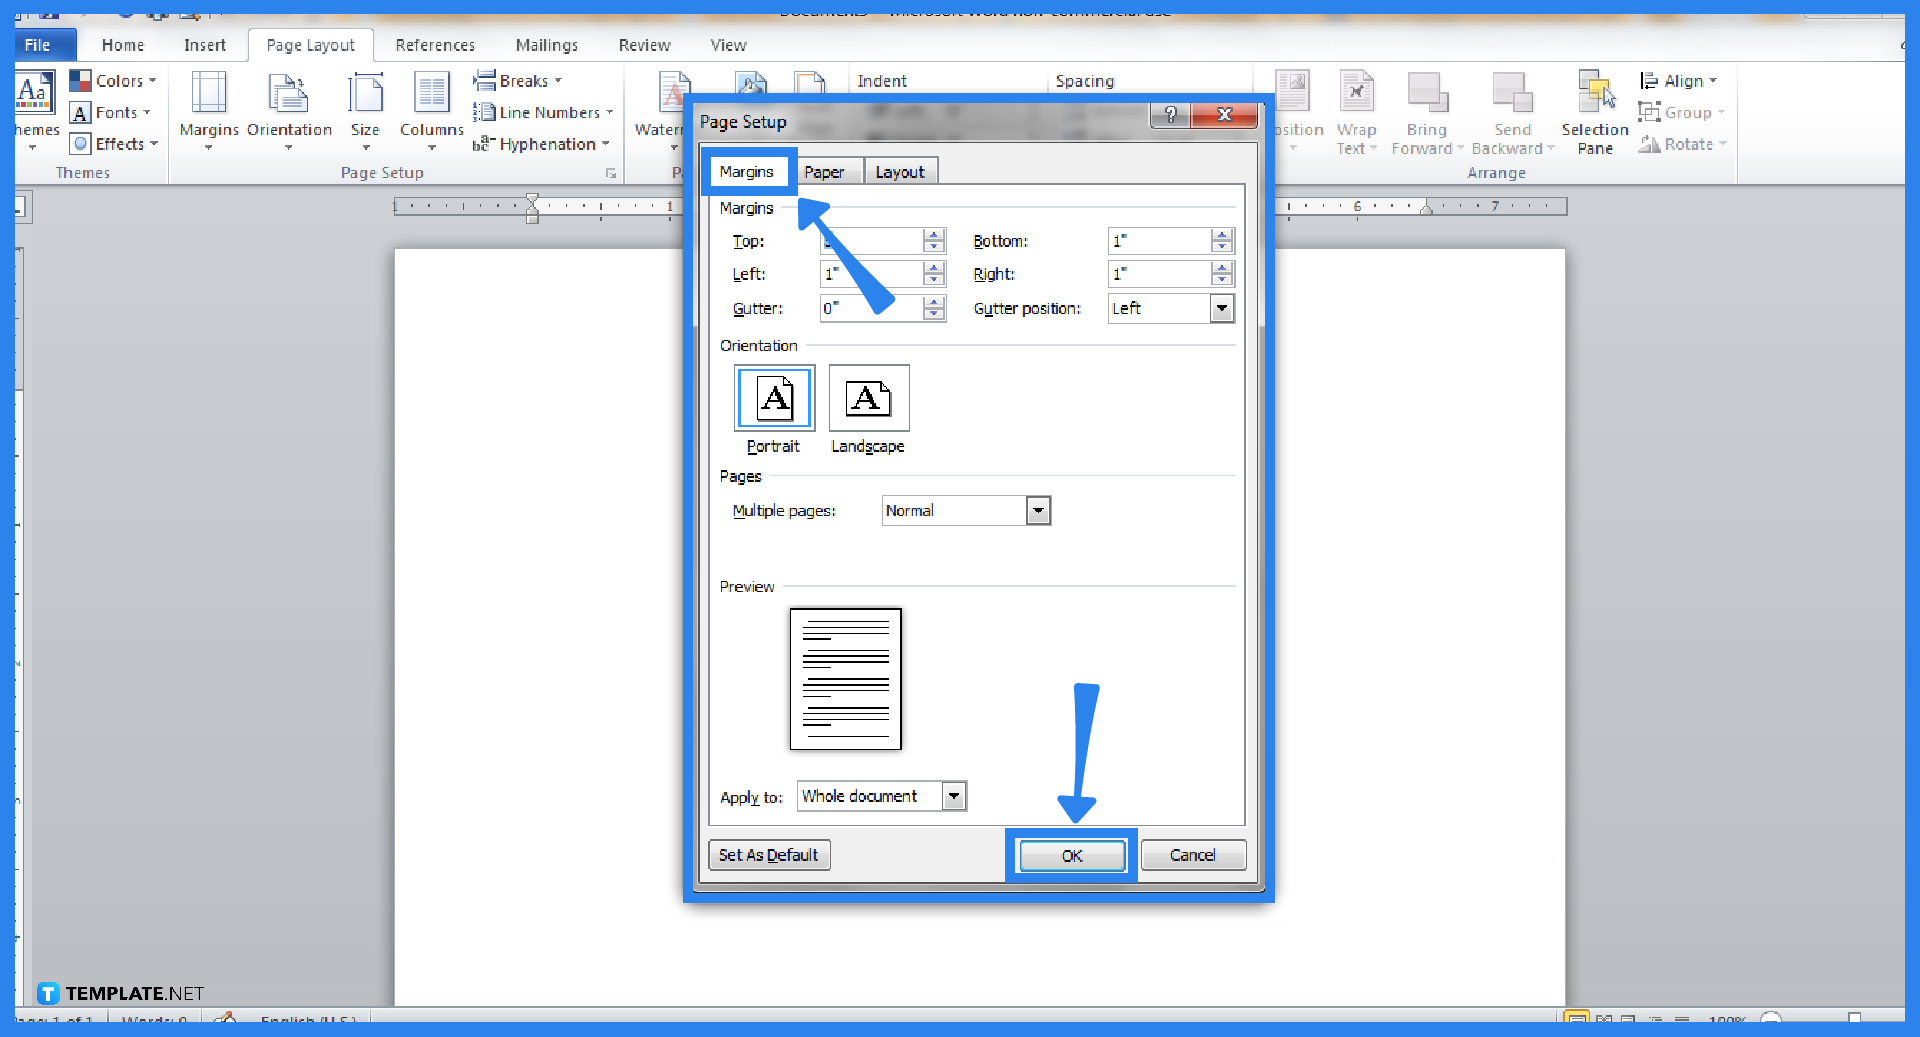
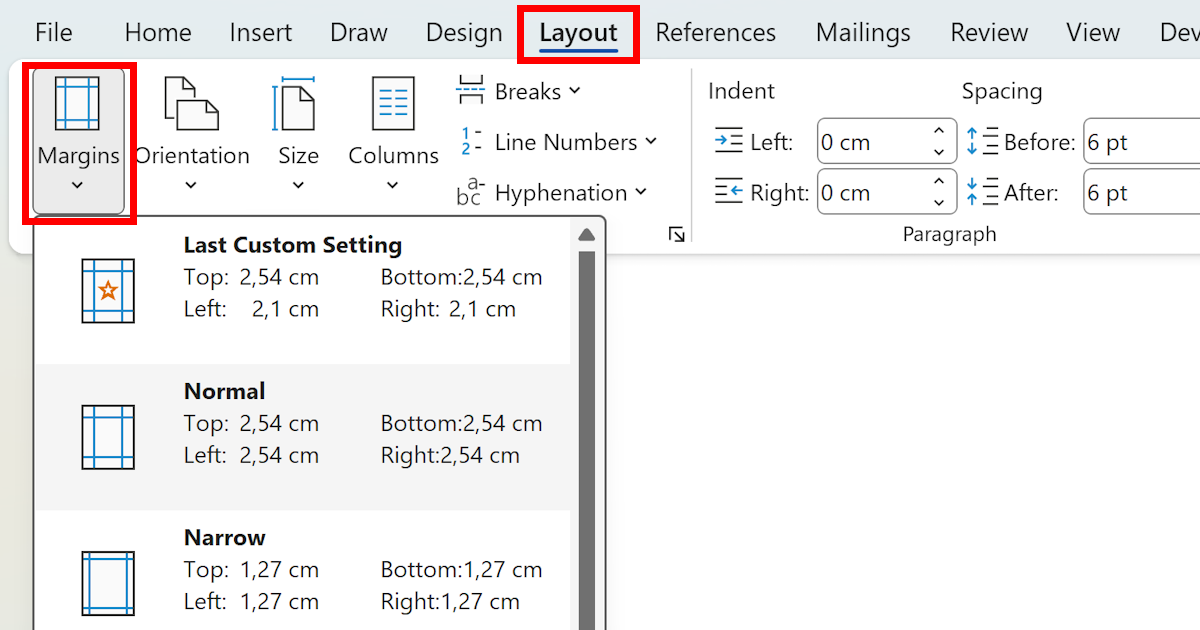
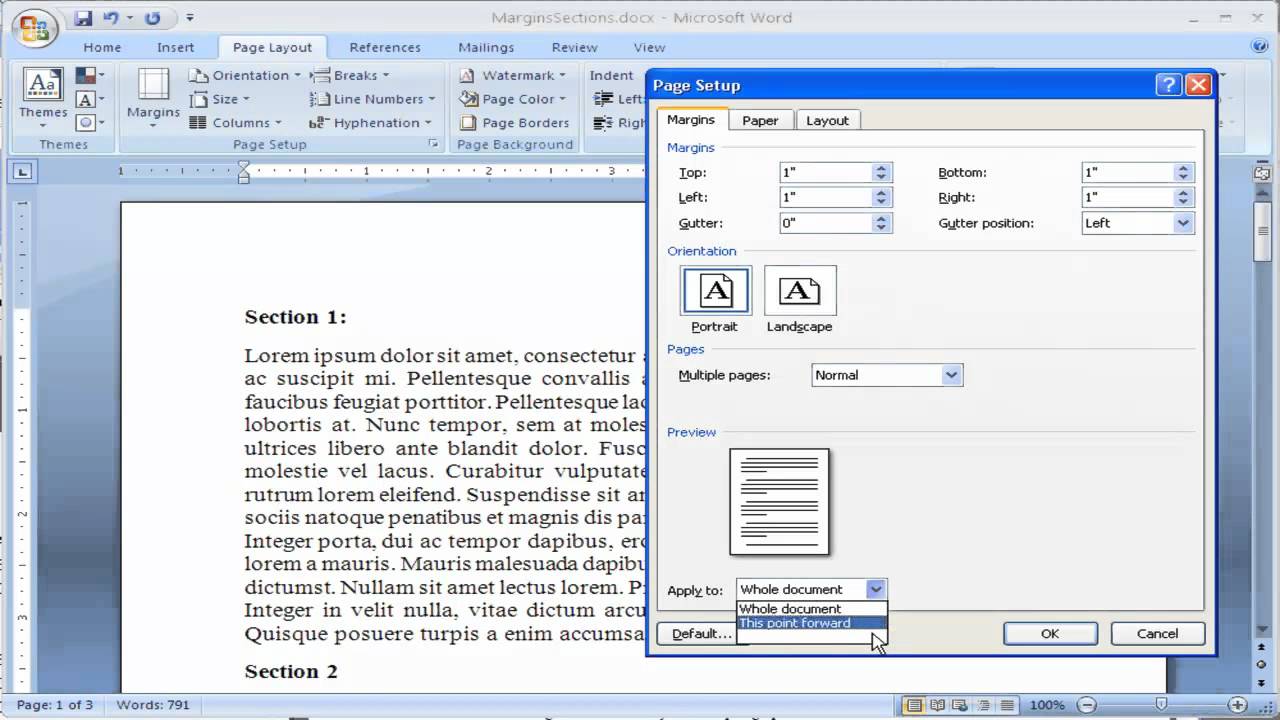
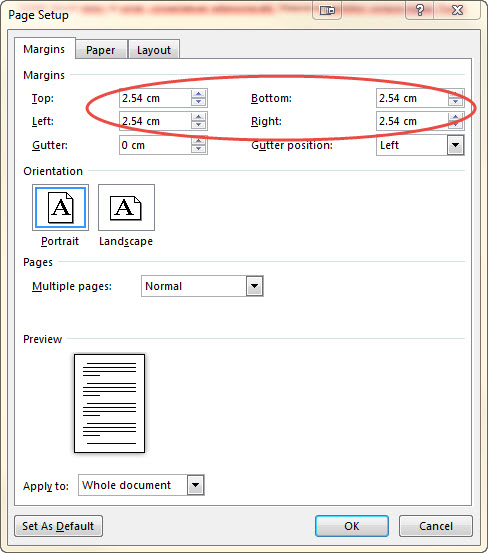
To adjust the margins in Word, go to the Layout tab and click on the Margins button. From here, you can choose from a range of pre-set margin sizes or opt to customize your own. It's essential to consider the type of document you're creating and the intended audience when selecting your margins. For instance, a business report may require narrower margins to accommodate more content, while a creative project might benefit from wider margins to add visual appeal.
In addition to adjusting the margin sizes, you can also customize the orientation and layout of your pages. Word offers a range of options, including portrait, landscape, and custom layouts. By experimenting with different margin settings and layouts, you can create a unique and engaging document that stands out from the crowd. With these tips and tricks, you'll be well on your way to mastering printable margins in Word and taking your document creation to the next level.